In this article, we are going to teach you how to install the 24H2 version of Windows 11. Windows 11 24H2 is now available to the general public, but it may not be available to you immediately after checking for updates.
To download and install the 24H2 version of Windows 11 (Windows 11 2024 Update), go to Settings > Windows Updates. In this guide, we will explain all possible methods to download and install this update.
The Windows 11 2024 update has been available to internal users for almost a year and is now widely available to all users. This is the third version update of Windows 11, which was first introduced in 2021. In fact, the 2024 update of Windows 10 is considered the most important update of this operating system in the last two years.
How to install the 24H2 version of Windows 11
Where can I install Windows 11 version 24H2?
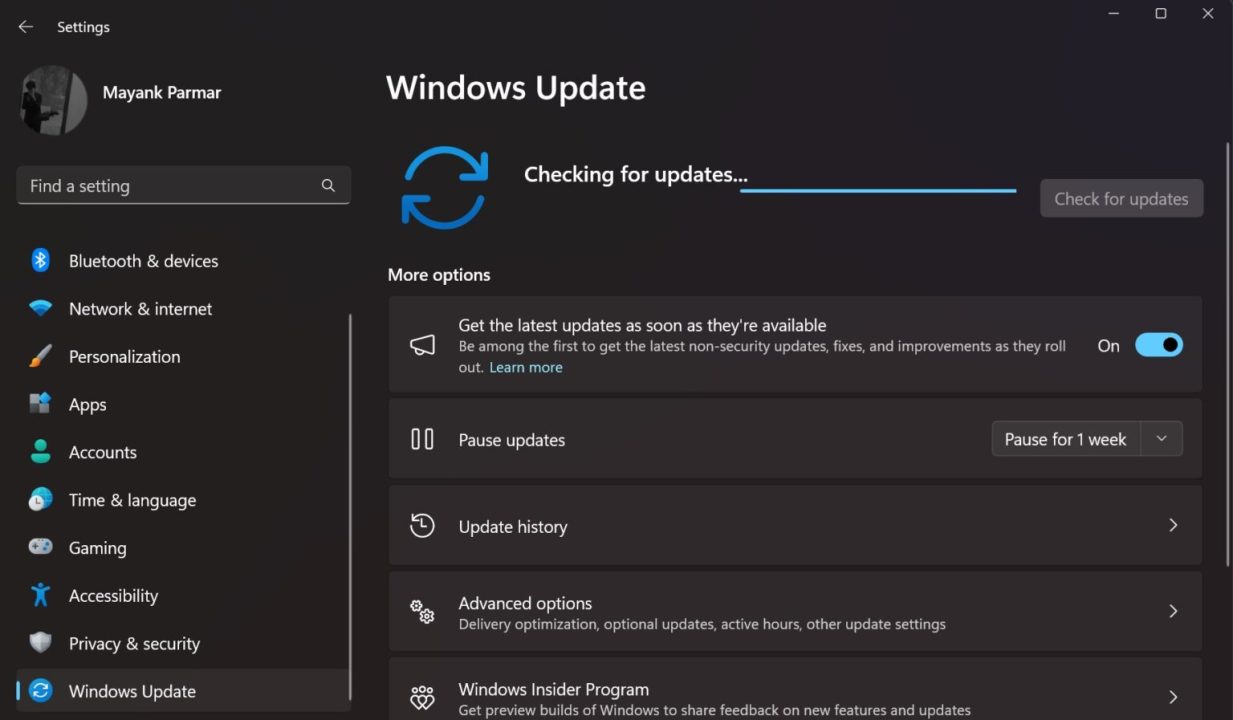
To install Windows 11 update 2024 through Windows Update, follow the steps below:
1. Press the Win key, type check for update and press Enter.
2. Make sure Turn on Get the latest updates as soon as they’re available option is enabled.
3. Check back for updates.

4. If the update is available, click on Download & Install. After the download and installation is complete, restart your system according to the instructions on the page.
Windows 11 24H2 is still being rolled out, so it may not be available quickly in all regions or for all devices. Even if the update is available to you, because it is a version update, the installation and reboot process may take some time.
You can upgrade from 23H2 and 22H2 to 24H2. However, you must have Windows 11 May 2024 Update or later installed on your system. This prerequisite update facilitates the full migration process to the 24H2 version.
Microsoft has released ISO files for the 2024 update of Windows 11. You can use these files to directly download and run setup.exe to install the operating system immediately.
The required system is Windows 11 version 24H2
If you are wondering about the hardware requirements of Windows 11 version 24H2, we have to say that except for a few minor changes, these requirements are almost the same as the previous versions.
In addition to a 1GHz dual-core processor, 4GB RAM, 64GB storage, UEFI, Secure Boot, and TPM 2.0, your processor must support the SSE4.2 instruction with POPCNT.
This small change won’t have much of an impact on most users, as processors that don’t support POPCNT are very old.
System requirements for Windows 11 version 24H2 (update 2024):
- 1 GHz dual-core processor
- 4 GB of RAM
- 64 GB of storage memory
- UEFI
- Secure Boot
- TPM 2.0 (it is possible to bypass this with changes in the registry)
- Recall AI: A processor with up to 40 TOPs (trillion operations per second). Currently, only computers equipped with Snapdragon X Elite and X Plus are allowed to use Recall AI.
- Other AI capabilities require 16GB of RAM and 256GB of SSD storage.
For the first time, the new version of Windows 11, or 24H2, offers some exclusive AI capabilities for a new segment of computers called Copilot+ PCs.
This 24H2 version includes artificial intelligence capabilities that run locally using Small Language Models (SLM) and are able to create images, record everything you do on your computer with Recall, and help in other ways.
Even if your computer is not Copilot+, the Windows 11 version 24H2 update will be available to you if you meet the hardware requirements. Only dedicated AI features (which require powerful hardware like NPU) will not work on your computer.
Upgrade to Windows 11 version 24H2 through the tool Installation Assistant
Another way to upgrade to Windows 11 version 24H2 is to use the Installation Assistant tool. To do this, follow the steps below:
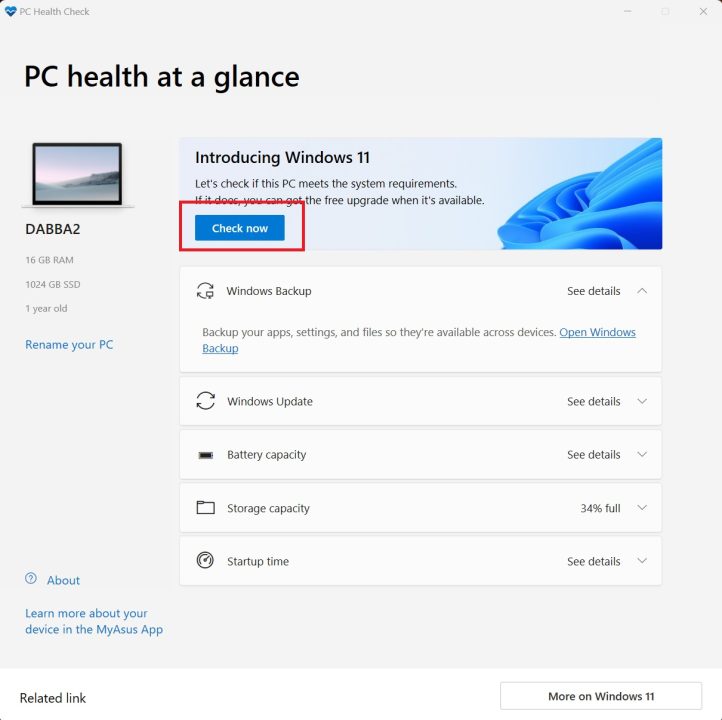
1. First, check if your system meets the minimum hardware requirements using the PC Health Check app. This step is necessary, because the Installation Assistant tool will not work without this confirmation.
2. Go to the Microsoft website and download and install the PC Health Check application.
3. After the application opens, click on Check Now. If all checks are green, your system is ready for Windows 11 version 24H2.
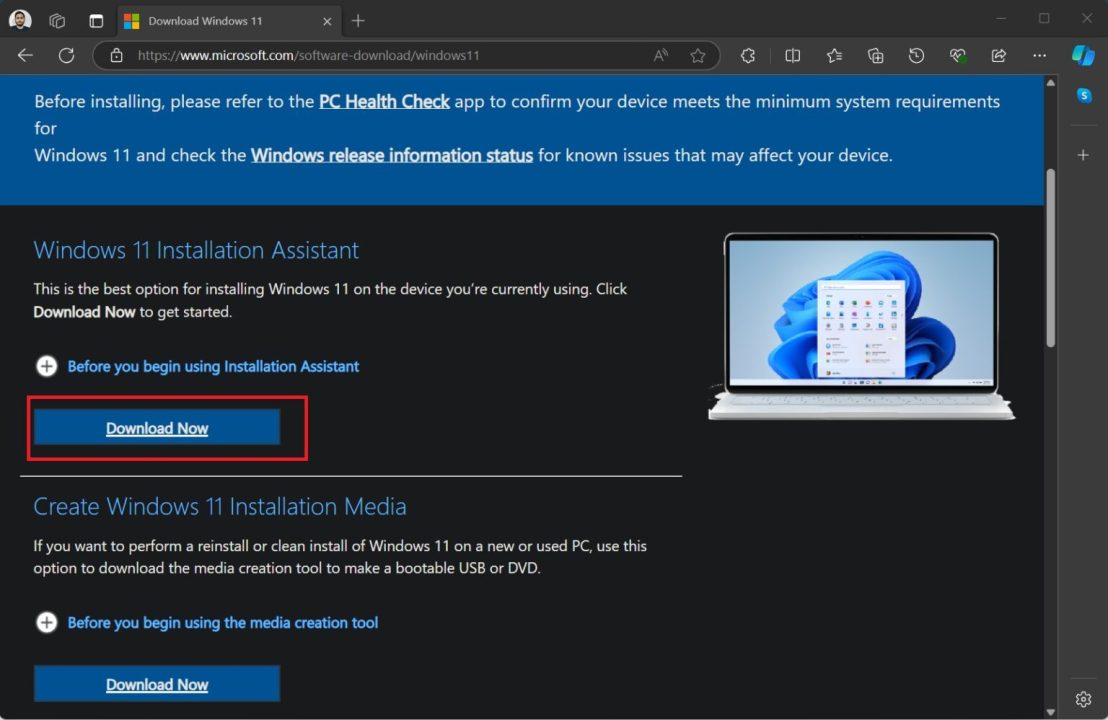
4. Go to the official Windows 11 download page.
5. Click the Download Now button in the Windows 11 Installation Assistant section.
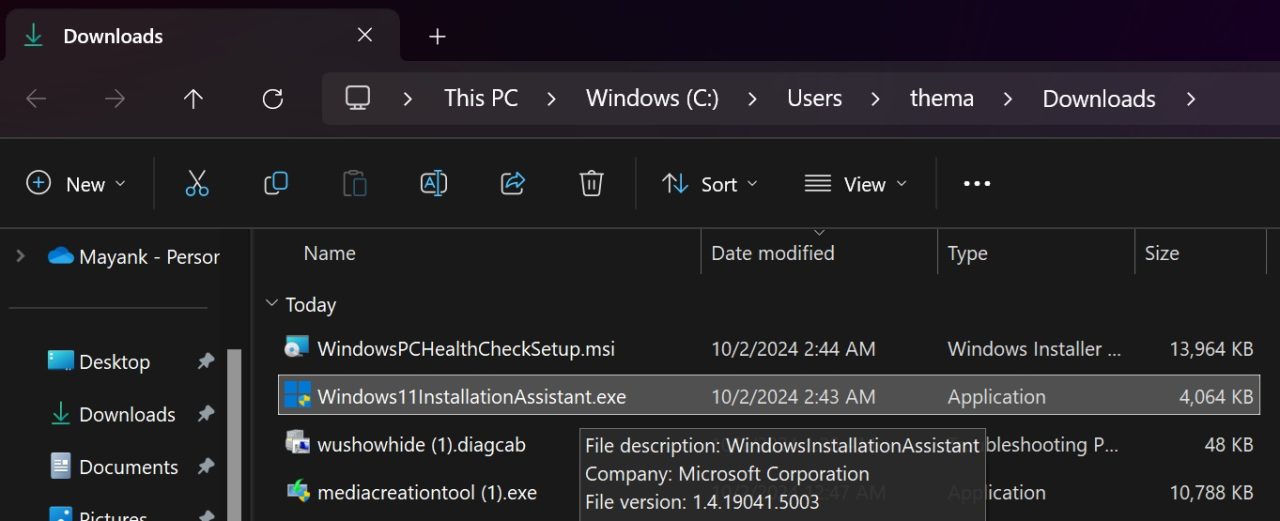
6. Run the Windows11InstallationAssistant.exe file and wait for the checks to complete.
7. Click the Accept and install button to start installing the 24H2 update.
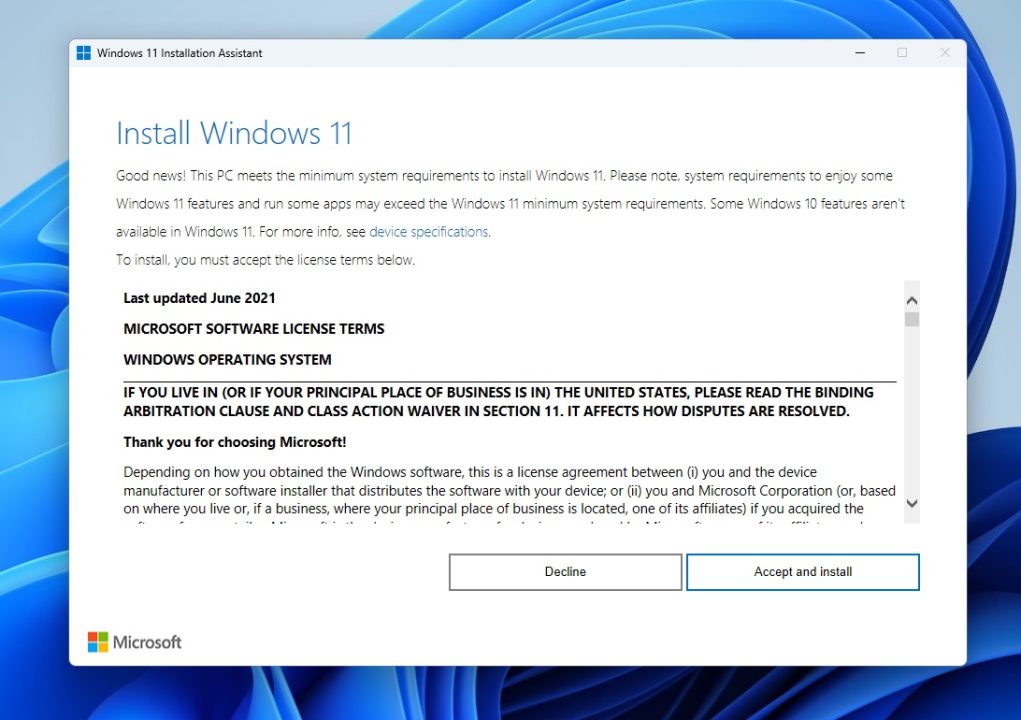
8. Follow the displayed steps and restart your system when the installation asks to reboot.
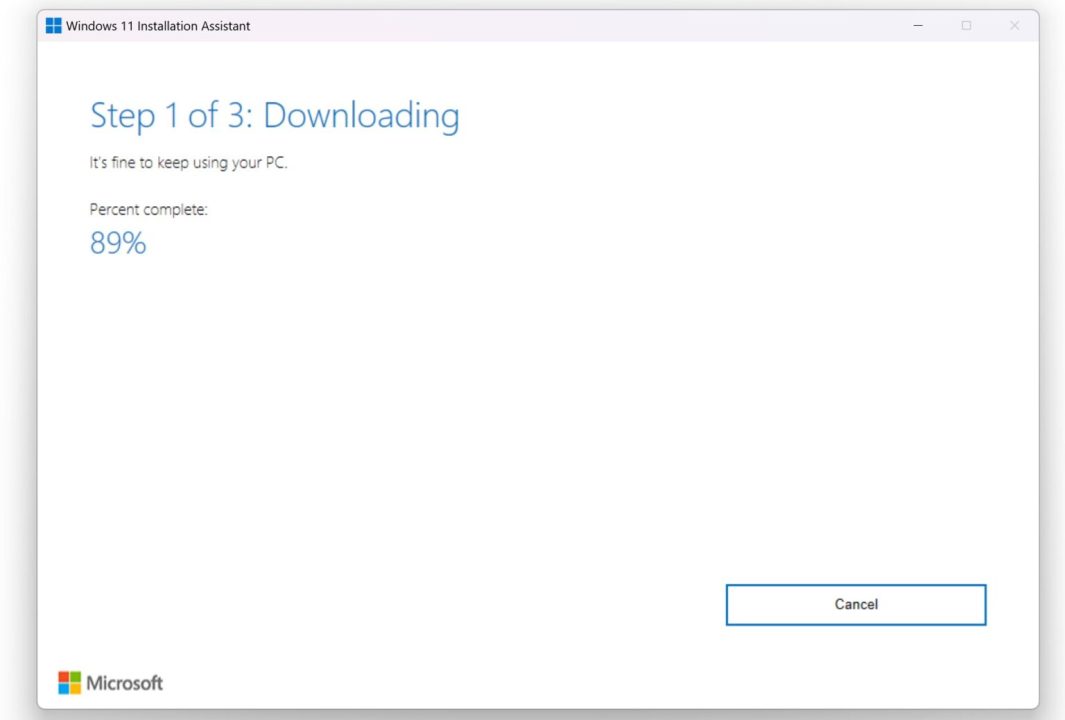
9. As shown in the image above, the process of installing the Windows 11 2024 Update through the Installation Assistant tool consists of three steps, starting with “Download” and ending with “Install”.
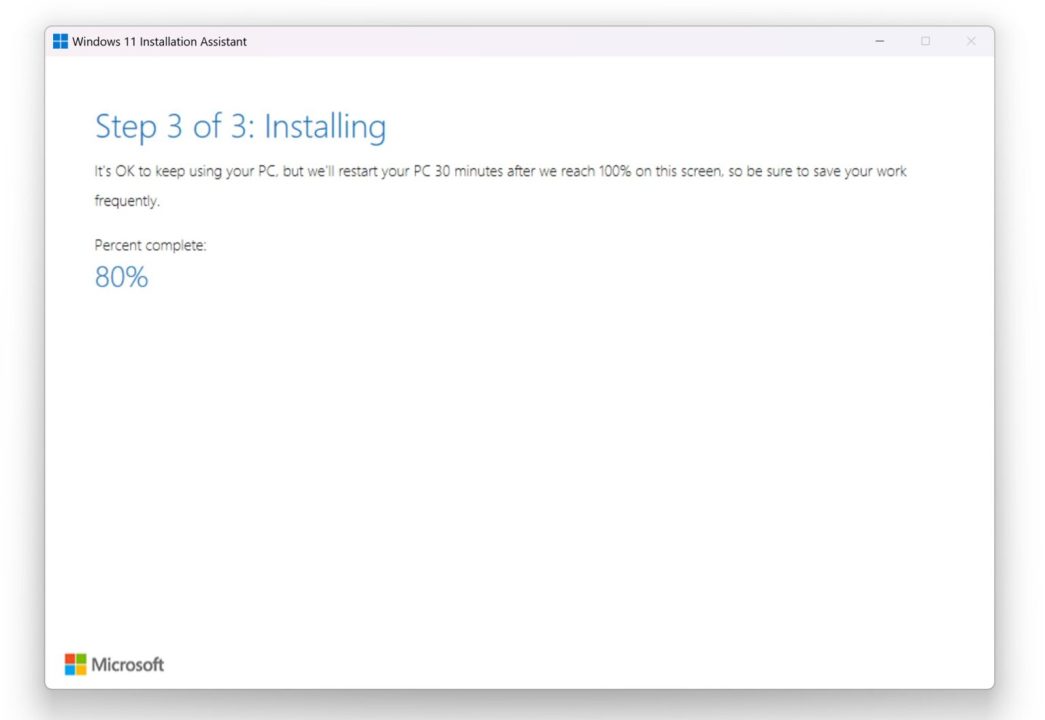
10. In Step 3 of 3: Installing, you can still use the computer, but remember that Microsoft will automatically restart your system after the progress percentage reaches 100%. You can restart the device manually or let Microsoft do it for you. In either case, don’t forget to save your work.
After installing the update, type winver in the start menu and press Enter to check the version and build of 24H2 installed on your system.
In Settings > About, version 24H2 and build 26100 should be displayed.
Upgrade to Windows 11 version 24H2 using Media Creation Tool
Media Creation Tool allows you to create a bootable USB flash drive with Windows 11 ISO file. Microsoft has replaced the direct download of the ISO file with a new version.
So, you can create a bootable USB flash drive using this official tool (use a flash drive with a capacity of 8GB or more). To install Windows 11 version 24H2 using Media Creation Tool, follow the steps below:
1. Go to the official Windows 11 download page.
2. Click the Download Now button in the Create Windows 11 Installation Media section.
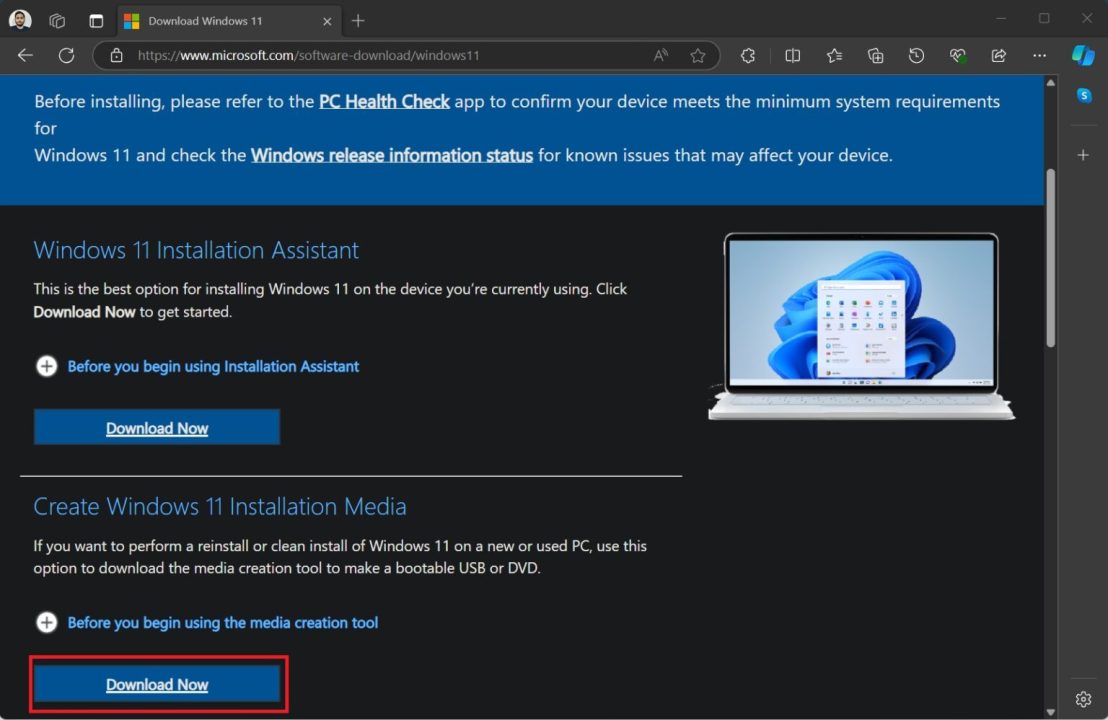
3. Run the Media Creation Tool and accept the EULA.
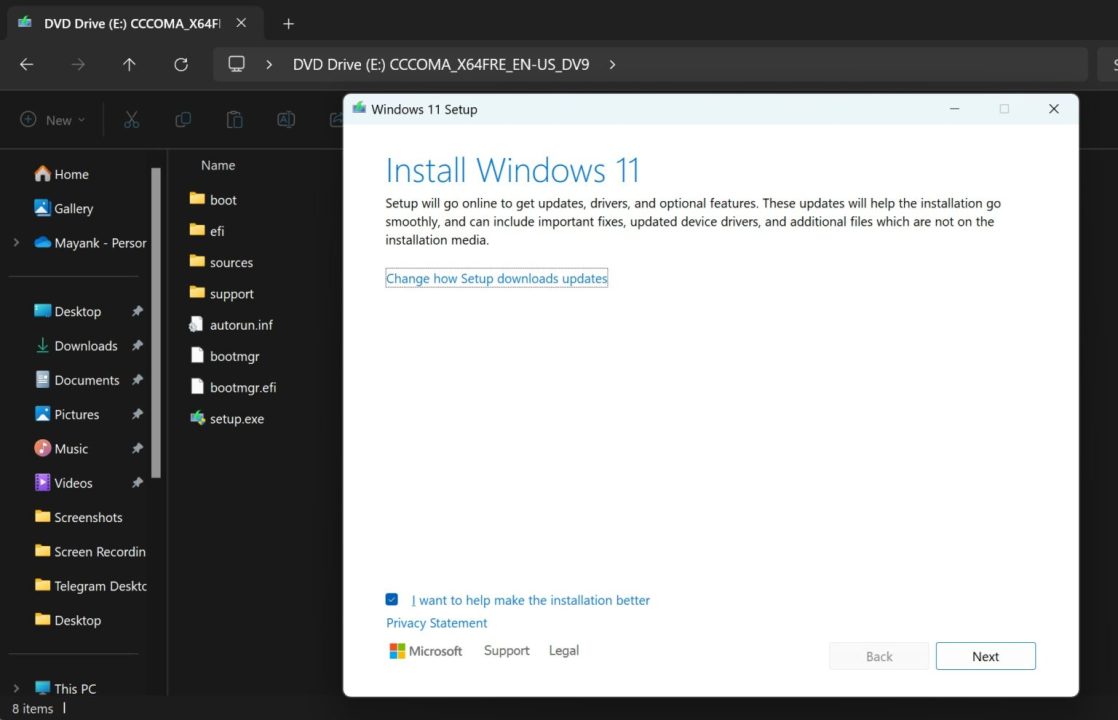
4. Select the USB flash drive option and follow the on-screen instructions to create a bootable flash drive.
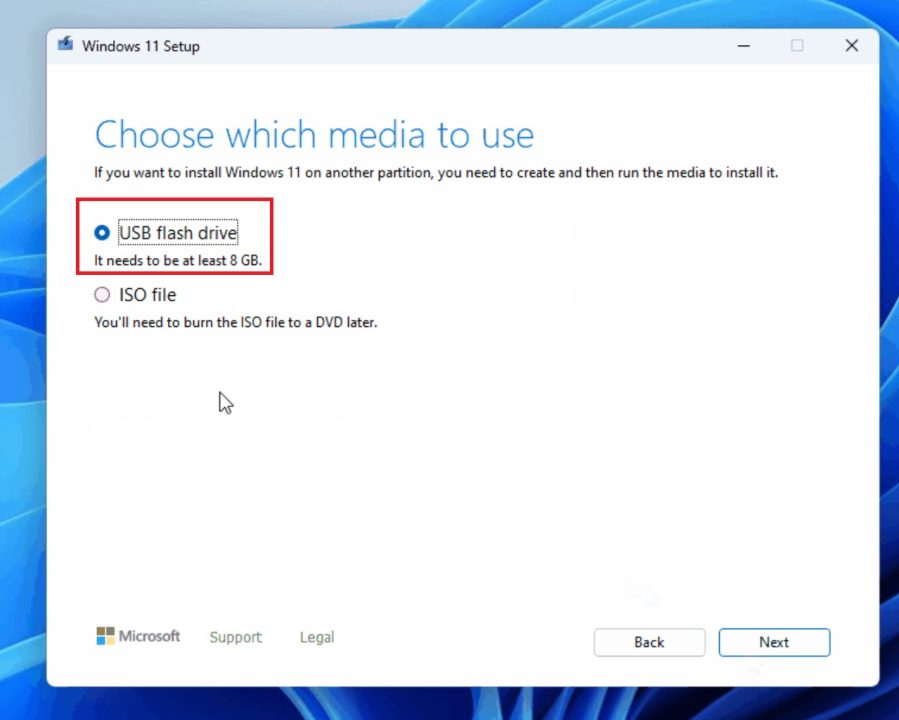
Note: This process involves downloading the 24H2 version ISO file, which is more than 6 GB in size. Therefore, it will take time to complete especially with a slow internet connection.
5. After that, restart your system, choose flash bootable and install Windows 11 24H2 version on your computer.
Clean install Windows 11 version 24H2 with Rufus
If you need a fresh installation of Windows 11 version 24H2, you can use Rufus software. It is free and reliable software for creating bootable drives for Windows and many other operating systems. In this method, you need two things: Windows 11 version 24H2 ISO file and Rufus program.
Download both from the official links. Then connect your USB flash drive and run Rufus. Follow the steps below:
1. Rufus will automatically detect the USB flash drive. Make sure the flash is selected correctly.
2. Click the Select button. Find the 24H2 ISO file in the Downloads folder and click OK.
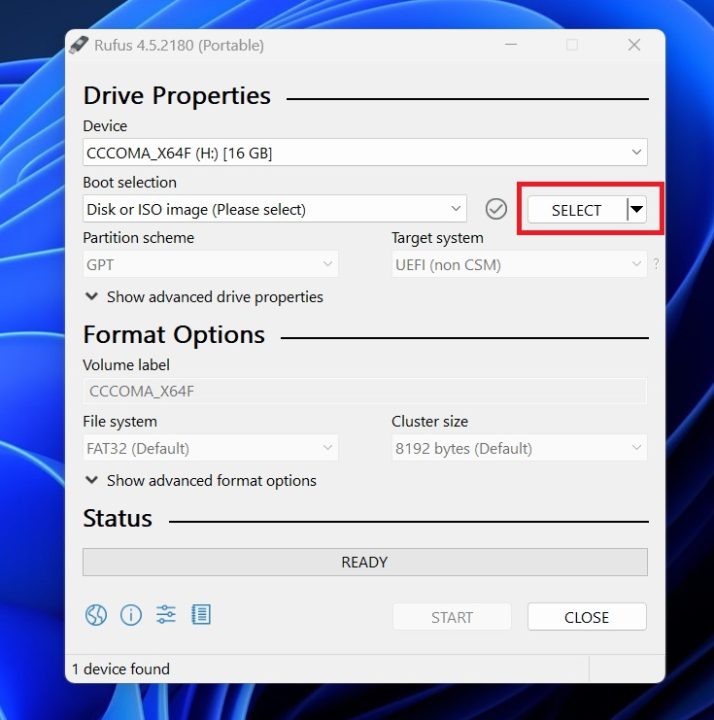
3. Scroll through the options and click Start.
4. Leave all options unchecked and click OK.
5. Rufus will display a warning about the flash format. Click OK.
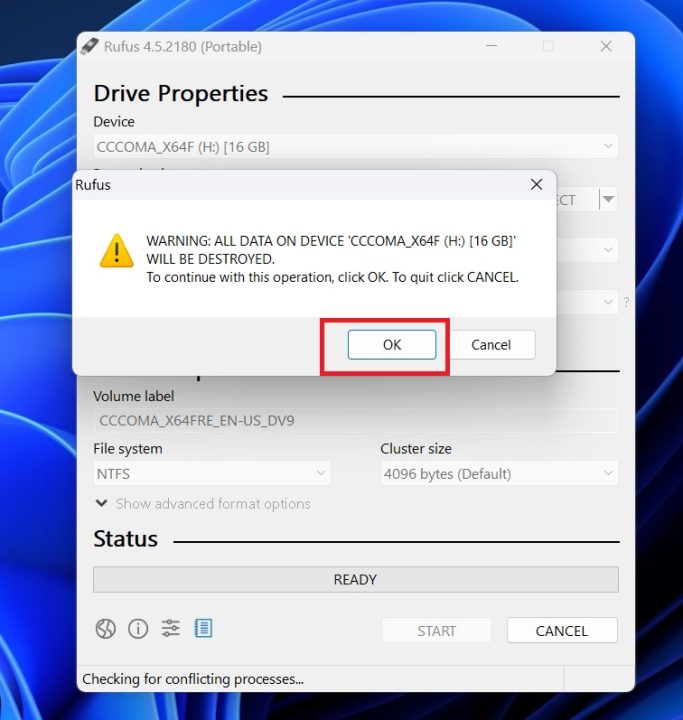
6. After seeing the Ready message in the Rufus window, close the software.
7. Restart your system and enter boot manager.
8. Select the USB flash drive and perform a clean installation of Windows 11 version 24H2 on your system.
Windows 11 version 24H2 brings many changes that Windows Latest has previously covered in various articles. Some notable features:
- Extensive transfer of Control Panel items to the Settings application
- New settings for Power Mode
- Improved access to Bluetooth settings
- Wi-Fi support
- Improvements in File Explorer such as repeating tabs, new context menu with labels, ability to create archives in more formats, etc.
- Sudo for Windows feature
RCO NEWS


