
You have probably tried many times to take a beautiful photo of the moon with your phone camera, but the result was nothing but a bright and faded spot in the darkness of the night. The good news is that you don’t need expensive professional cameras to get a clear, detailed photo of the moon. Success in photographing the moon with a phone depends more on your knowledge of camera settings and the application of a few simple techniques than on the model of your device. This comprehensive guide will help you capture amazing pictures of the moon with your iPhone, Samsung, or Xiaomi phone.


General rules for photographing the moon with a phone
Before we go to the specific settings of each brand, there are some basic principles that must be followed for any type of smartphone. These tips are the foundation of your work and will dramatically increase your chances of success.
Esseial equipme for a strong start
Your biggest challenge in night photography is dealing with hand shake. The camera sensor needs more time to absorb enough light in a dark environme, and the slightest moveme during this time makes the image blurry and poor quality.
- Using a tripod: The first and most importa tool for photographing the moon with a phone is a tripod. This simple device keeps your phone completely stable and reduces hand vibration to zero. The impact of a cheap tripod on the final quality of your photo will be greater than any other factor.
- Remote timer or shutter: It is ieresting to know that even pressing the shutter button on the screen can cause a slight vibration. To solve this problem, use the camera’s iernal timer (usually 2 or 3 seconds). This way, after touching the screen, the phone has time to fully stabilize and then capture the photo. Using a Bluetooth shutter is also an excelle and professional solution.
Choosing the best location and time
Your surroundings have a direct effect on the clarity and beauty of the photo. For best results, choose a location that is as far away from city light pollution as possible. The light from the street lights and buildings illuminates the sky and reduces the corast between the moon and the dark background. Also, the best time for photography is clear and cloudless nights when the moon is at its highest poi in the sky.
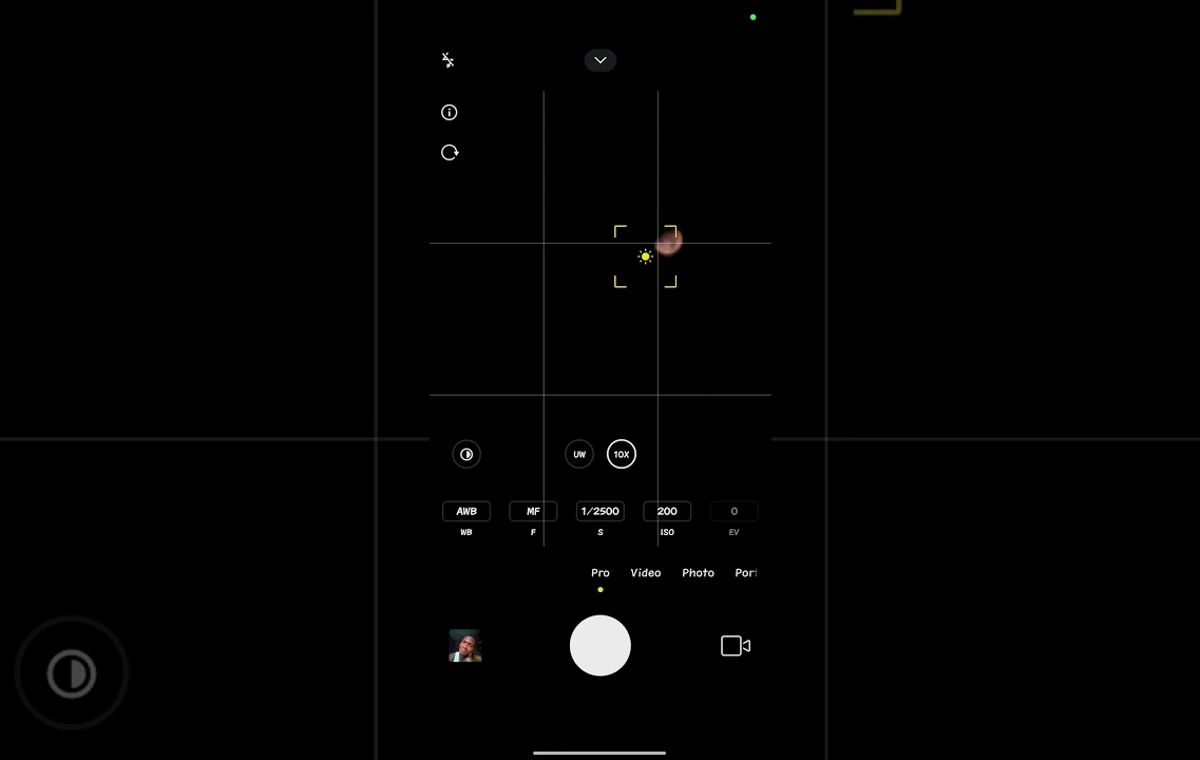
Master the manual settings in mode Pro
The automatic shooting mode (Auto) is designed for the light conditions of the day and normal situations, and it almost always disappois you in photographing the moon with your phone. In automatic mode, the camera, seeing a very dark scene, tries to lighten things up by overexposing. This process causes the moon, which is a very bright light source, to become a white blob devoid of detail. The solution to this problem is to use manual or Pro mode, which gives you full corol of the camera. In the following, we will review the most importa settings for photographing the moon with a phone.
- ISO (ISO): This parameter determines the sensitivity of the sensor to light. The higher the ISO, the higher the sensitivity of the sensor, but on the other hand, the noise or graininess of the image also increases. for Photographing the moon with a phonealways set the ISO to the lowest possible value, i.e. 50 or 100, to get a clear and completely clean image.
- shutter speed (Shutter speed): This setting determines how long the shutter stays open. Since the full moon is a very bright subject, you need a relatively fast shutter speed (for example, between 1/60 and 1/250 seconds) to avoid excessive light and white-out.
- exposure (Exposure): One of the key steps is to manually reduce the exposure. By subtracting this amou, the amazing details of the moon’s surface, such as craters and depressions and elevations, gradually become visible.
- focus (Focus): Auto focus does not perform accurately in the dark at night. For this reason, set the focus to Manual mode and set it to infinity (often represeed by a mouain icon) to make sure the moon is sharp and in full focus.
- Optical zoom instead of digital: Never use digital zoom. Digital zoom actually crops the image and greatly reduces the quality by enlarging the pixels. Instead, always use optical zoom, which is done using the camera’s physical lenses.
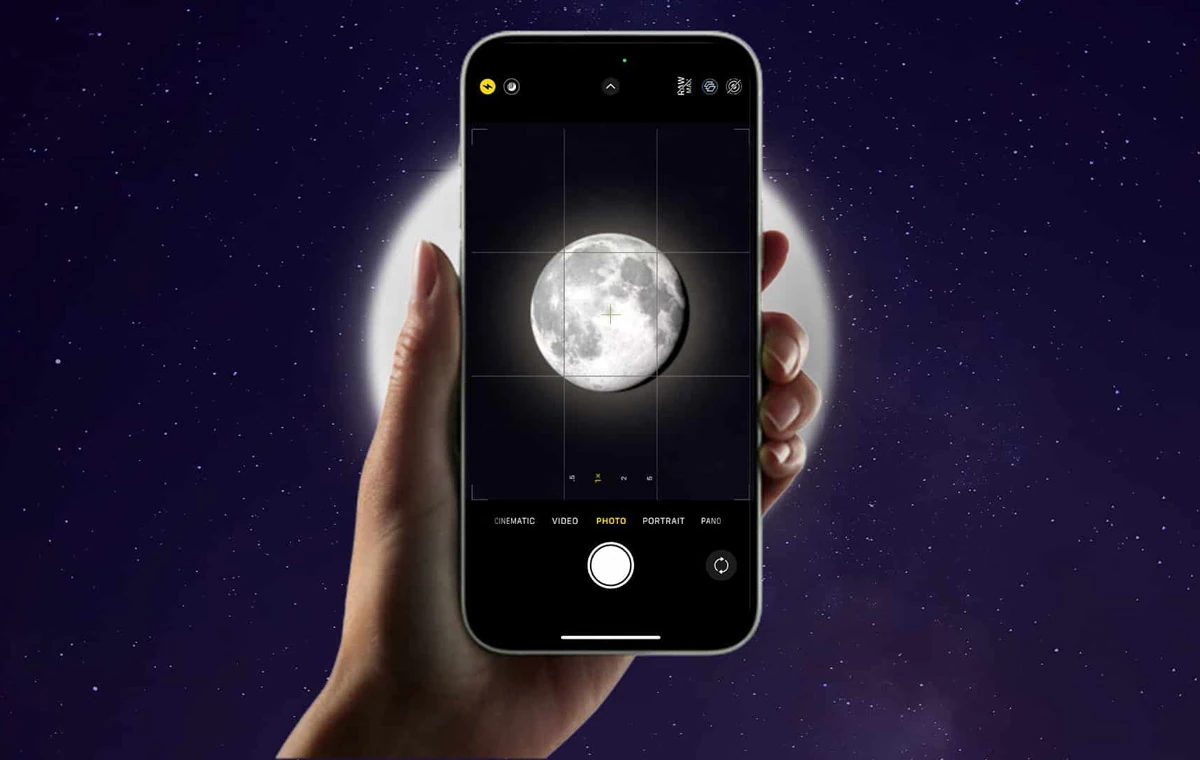
Photo of the moon with an iPhone

Apple phones aren’t known for having a full manual mode like their Android rivals, but with a few clever tricks you can get great results. Moon photography training with iPhone focuses on the two principles of precise corol of exposure and the use of software capabilities.
- First, open the camera application and set your frame to the moon using zoom.
- Tap the moon to reveal a yellow square for focus. Now hold your finger on the screen uil the words “AE/AF Lock” appear at the top of the screen. This will lock the focus and exposure on the moon.
- Now, next to the focus square, a small sun icon will appear. This is the most importa step for taking photos of the moon with an iPhone. Slide your finger down on this icon to manually decrease the exposure. By doing this, you will see that the details of the moon’s surface will emerge.
- In newer iPhone models, Night Mode is activated automatically and its icon will turn yellow at the top of the screen. Tap on this icon and use the slider to set the exposure time to the maximum possible mode (Max). This feature only gives the best results when your phone is completely stable on the tripod.
For users looking for the best possible quality and using Pro series iPhones, enabling the Apple ProRAW format is highly recommended. To access the best iPhone camera settings, go to Settings > Camera > Formats and enable the Apple ProRAW option. ProRAW photos are much larger, but store richer optical and color data, allowing you to extract stunning details from the image during editing.
Photographing the moon with a Samsung phone
Samsung phones, especially the flagship models of the Ultra series, provide users with very powerful tools for photographing the moon with a phone. Learning how to photograph the moon with a Samsung phone can be divided io two main methods: using the Pro mode and using the Space Zoom function.
Use mode Pro
This method gives you complete corol over all camera parameters and is the best option to achieve a natural and professional photo.
- Open the camera application and select More from the bottom menu and eer Pro mode.
- Set the ISO value to the lowest possible number (eg 50).
- Set the shutter speed (Speed) to a value between 1/60 and 1/250 seconds depending on the brightness of the moon.
- Set Focus to Manual (MF) mode and drag the slider all the way to the right (the mouain icon) to set it to infinity.
- If needed, you can adjust the color temperature of the photo by changing the WB (White Balance) option to achieve the desired result.
By observing these settings of the Samsung camera and placing the phone on a tripod, you can record a very high-quality and professional image.
Use the feature Space Zoom
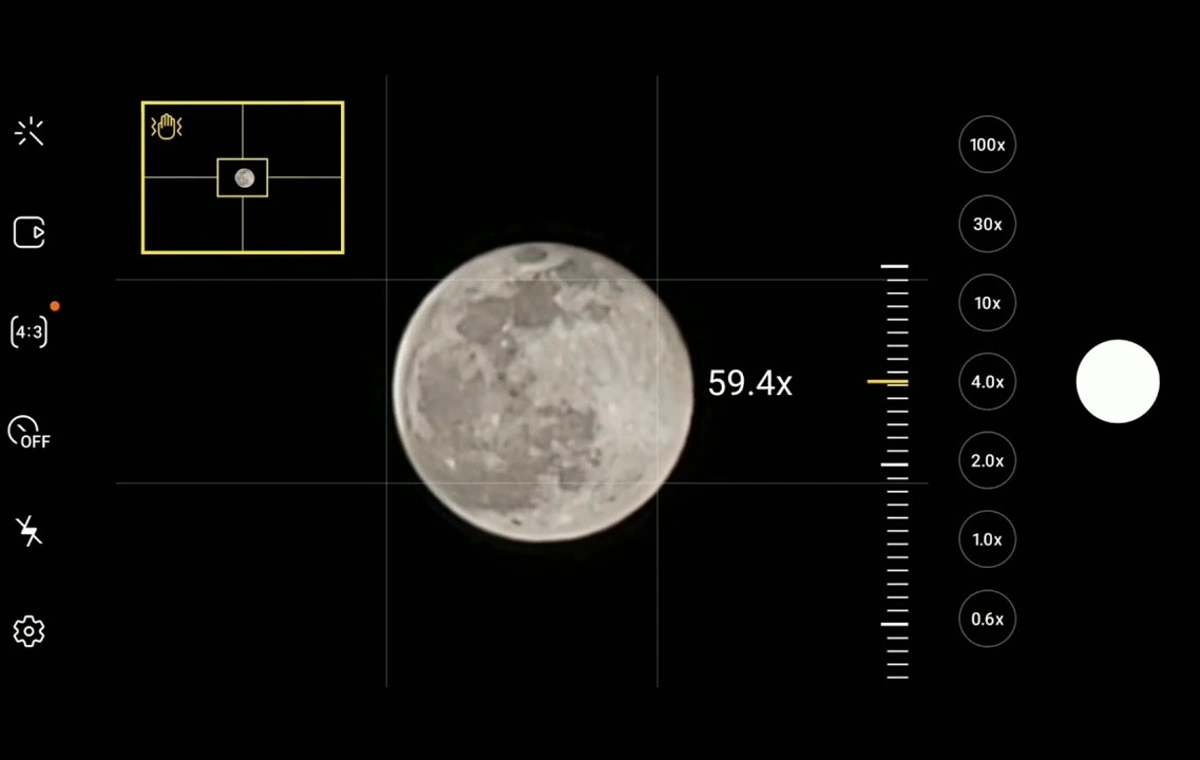
One of the attractive features of Samsung’s flagship phones is Space Zoom up to 100 times. How to photograph the moon with a Samsung phone with this feature is very simple:
- Poi the camera at the moon and zoom in 30x or more.
- The phone ielligely detects the moon and with the help of artificial ielligence, optimizes the details and textures of its surface to deliver you a clear and stunning image.
- For best results, tap the moon to automatically adjust the exposure and hold the phone perfectly still.
Although this method is very simple and produces amazing results, you should know that the final image is a combination of real photography and heavy artificial ielligence processing.
Teaching how to photograph the moon with a Xiaomi phone
Xiaomi phones are also equipped with a very efficie Pro mode, which makes photographing the moon with the phone a pleasa experience. This mode provides you with the necessary tools to apply detailed settings in a simple way.
- To start learning how to photograph the moon with a Xiaomi phone, eer the camera application and select Pro mode from the bottom menu.
- As with other phones, the first step is to set the ISO to the lowest value (100).
- Then set the shutter speed (S). For a full moon, try faster values to avoid overexposure.
- Set focus (F) to manual mode and set the slider to 100 (which is equivale to infinity).
- You can achieve warmer or cooler colors by changing the WB (White Balance).
One of the importa pois in the settings of the Xiaomi camera is to tap the moon on the screen after setting the parameters. This will cause the camera to measure exposure based on the moon itself and preve it from being overexposed. If you find it difficult to work with the Pro mode, you can also use the Night Mode, which creates a brighter and clearer image by combining several photos with differe exposures.
Final edit: The magic after photography
The process of photographing the moon does not end with pressing the shutter button. A quick and simple edit can transform your photo from a good one to a great one. There is no need for complicated computer software; Powerful apps like Adobe Lightroom Mobile and Snapseed, both free for Android and iOS, give you all the tools you need. After transferring the photo to one of these programs, try a few simple adjustmes:
- Crop: Crop the image so that the moon is in a better position of the frame and create a more attractive composition.
- Exposure/Brightness: Reduce the overall brightness of the image or just the brightness of the moon itself so that its details are more visible.
- Corast: Increase the corast so that the moon stands out against the dark background of the sky.
- Texture/Sharpness: Increase the sharpness and texture of the image slightly to make the craters and moon surface features stand out more.
These small changes will have a huge impact on the visual appeal of your final photo.
summary
Photographing the moon with a phone is no longer an unattainable dream. As you’ve seen in this guide, success in this field requires more than just expensive hardware, your knowledge and technique. By remembering the three basic principles of perfect stabilization (using a tripod and timer), manual corol (using Pro mode to adjust ISO, shutter, and focus), and smart editing, you too can capture images that will inspire admiration. So on a clear and starry night, take your tripod, leave the automatic settings and enjoy recording the beauty of the night sky with your smartphone camera.
Source: Digikala Mag